Interior
Nail Pops and Settling Cracks in New Calgary Builds: Fix Them Before You Paint
By Franklin SamuelPublished Last updated 5 min read
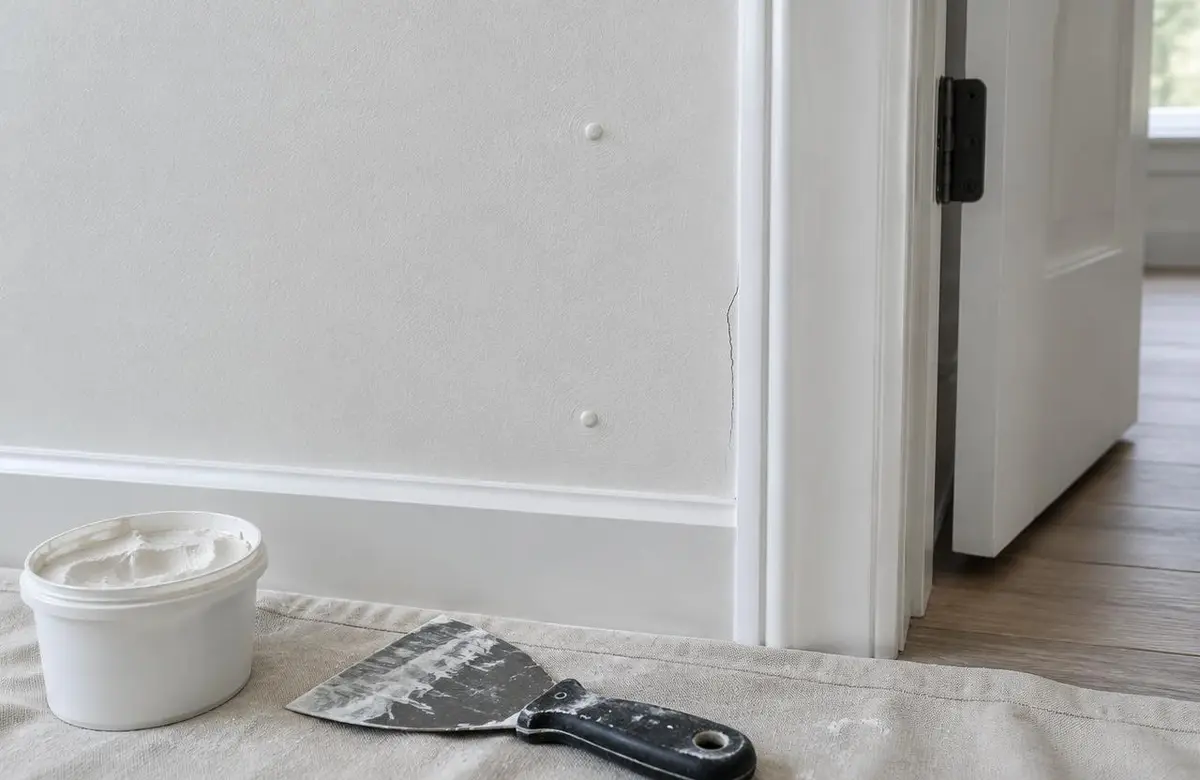
You move into a new Calgary home, hang a few pictures and start noticing little circles on a wall. Then a fine crack appears near a ceiling or along a corner. It is frustrating when everything still feels new. These marks often relate to drying framing and building movement, but I check what the surface is telling us before calling every crack routine settling.
Painting straight over a raised fastener or a split seam leaves the underlying problem in place. The colour might hide it briefly, but side light will still catch the bump. My approach is to look at the repair first, deal with loose or moving material and then plan the paint so the repaired area does not stand out.
Why do new Calgary homes develop these marks?
Framing lumber contains moisture when a house is built. As it dries, its dimensions change. Calgary's dry climate and the indoor heating season can make that drying especially noticeable. The drywall attached to the framing does not move in exactly the same way. Small shifts can show up where sheets meet, around fasteners or at transitions between surfaces.
People often call all of this settling. Some movement does relate to the building and its supporting materials adjusting, but that label is not a diagnosis. The location, shape and history of a crack matter. I want to know when it appeared, whether it has changed and whether there are other signs nearby, such as a door that has started sticking.
A fine, stable finish crack calls for a different conversation from a widening crack with displaced edges. Stains, soft drywall or a damp smell need attention to moisture before cosmetic repairs. If a crack keeps growing, comes back repeatedly or appears with other movement, ask the builder to investigate the cause before covering it up.
What is a nail pop or screw pop?
A fastener pop may look like a small round bump, a cracked circle of compound or a spot where the fastener head has broken through the surface. Despite the name, it can happen at screws as well as nails. Movement between the framing, drywall and fastener can disturb the thin finish over the head.
Pressing more compound over that bump does not secure the board. First I check whether the drywall is firm against the framing. A repair can involve resetting the fastener or adding a properly placed drywall screw into sound framing. An ineffective fastener needs attention too. The goal is to secure the board without tearing the face paper with an overdriven screw.
Why do seams and outside corners crack?
A straight crack along a board joint can involve movement, loose tape or a weak joint finish. It needs inspection before the repair is chosen. Painting a stripe across it does not rebuild the joint. If tape has released, the loose portion needs to be dealt with so new tape and compound have a sound base.
Outside corners usually have corner bead beneath the finish. If the bead is loose or bent, the crack can return unless that issue is corrected. A corner beside a busy hallway may also have impact damage mixed in with movement. I check the bead and surrounding drywall, then secure or repair the corner before rebuilding its surface with compound.
Inside corners and wall-to-ceiling joints can show movement too. The repair depends on what has moved and how the joint was made. I do not automatically fill every inside crack with a bead of caulk. A failed taped joint may need re-taping, while repeated movement may need a closer look before a cosmetic repair is worth doing.
When should you fix cracks in a new build?
After the first heating season is a good rule of thumb for reviewing small, stable cosmetic defects. That gives the home a chance to go through a period of indoor heating and drying. It is not a reason to ignore a growing crack, water damage or a loose section of drywall. Those concerns should be reported when they appear.
Check your builder's warranty first, since the builder may be responsible for the repairs. Photograph the marks, record when you noticed them and follow the builder's reporting process. Ask about inspection timing before arranging outside repairs. Keeping the original condition visible can help the builder assess the issue and tell you what work they will handle.
If you are planning a colour change, coordinate the repair visit with the painting schedule. You do not want fresh paint opened up for a builder repair a short time later. Find out whether the builder's work includes primer, touch-up paint or a larger wall repaint. Those details affect what remains to be done before your room is finished.
What does a proper drywall repair involve?
For drywall repairs before painting, the method follows the defect. A fastener pop and a loose taped seam do not need identical work. I remove unsound material, secure what needs securing and rebuild the surface in controlled layers. Thick piles of compound are harder to blend and can take longer to dry through.
- Reset or add a fastener where the board needs securing.
- Remove loose tape or compound and re-tape failed joints as needed.
- Apply compound in layers and let each stage dry.
- Sand the repair smooth while preserving the surrounding surface.
- Remove dust, prime the repair and then apply the finish paint.
Sanding is part of shaping the repair, not a cure for every problem left underneath. I check the surface with light travelling across it, because that is how many wall defects become visible in daily use. Dust control and protection for floors and furniture belong in the repair plan, even when the actual patch is fairly small.
Why prime, and how much wall needs painting?
Fresh joint compound absorbs paint differently from an existing painted wall. Primer helps even out that difference before the finish coats. Without that step, a repair can show as a dull or uneven patch even when it feels flat. The primer needs to fit the repaired surface and the paint being applied over it.
A touch-up may blend on some walls, but colour age, sheen and daylight all affect the result. A patch near a large window is often easy to spot. Repainting the wall from corner to corner can give a more even appearance. When we discuss interior painting, I separate the repair work from the area needing finish paint so the scope is clear.
For a free estimate on repairs and painting, call or text 403-861-1963 or request a free estimate. Tell me whether you have spoken with your builder, and we can plan the next step.